Death Stranding 2 Skeleton Guide: Choosing Your Exoskeleton for Survival
Explore Death Stranding 2's exoskeletons—powerful tools that redefine survival with durability, speed, and strategy in brutal Australian wilderness.
When Sam Bridges ventures into the unforgiving Australian wilderness in Death Stranding 2, his journey isn't just about delivering packages—it's a test of endurance against brutal terrain, hostile factions, and supernatural threats. Luckily, he has access to three distinct exoskeletons, each designed to amplify his capabilities in unique ways. Players quickly learn that these aren't mere gadgets; they're lifelines that transform how Sam navigates the world. The Bokka Skeleton offers rock-solid stability, the Battle Skeleton turns him into a walking fortress, and the Boost Skeleton gifts him the speed of the wind. But here's the catch: no single skeleton is perfect for every scenario. Some might favor defense over agility, while others crave the thrill of a high-speed chase. It's all about how you play and what risks you're willing to take. After all, in a world where a misstep could mean doom, choosing the right skeleton isn't just strategy—it's survival. 😊
Let's dive into the Bokka Skeleton first. This beauty is all about keeping Sam steady on his feet, no matter how treacherous the ground gets. Picture this: steep mountain trails covered in snow, slippery riverbanks, or jagged slopes that would send most travelers tumbling. With the Bokka Skeleton equipped, Sam glides over these obstacles like he's on rails, never losing balance or stumbling. It's a godsend for explorers who prioritize safe passage over everything else. Plus, it allows Sam to carry an extra 120kg of cargo right from the first level, making it ideal for those long hauls where every ounce of supplies counts. But hold on—there's a trade-off. That impressive stability comes at a hefty cost: the skeleton guzzles battery power and stamina like there's no tomorrow. Imagine lugging a heavy load up a hill; you won't slip, but you might find yourself stranded with a dead battery halfway. It's frustrating, really, since the Bokka seems built for weight-bearing, yet it punishes you for using its full potential. Players who love methodical, cautious gameplay might adore this, but speed demons? Not so much. ⛰️
Next up is the Battle Skeleton, the go-to choice for players who aren't afraid to throw down with enemies. This is the first skeleton Sam gets, and for good reason—it turns him into a walking tank. When MULEs or Ghost Mechs start firing, the Battle Skeleton soaks up projectile damage like a sponge, giving players that extra layer of security. No need to sneak around or avoid confrontations; with this bad boy, Sam can charge headfirst into danger and come out relatively unscathed. It's not just about defense, though. The skeleton also boosts cargo capacity and adds a slight uptick to movement speed, making Sam feel more agile during heated skirmishes. Early on, this is a game-changer, especially for those who enjoy the chaos of combat. But let's be real: it's not perfect for stealth missions. If you're trying to slip past BTs unnoticed, the clunky armor might give you away. And while the speed boost is nice, it's nothing compared to the pure zip of the Boost Skeleton. Still, for players who relish a good fight, this skeleton is a reliable ally that balances protection with practicality. 🛡️
Then there's the Boost Skeleton, which is all about unleashing Sam's inner speed demon. 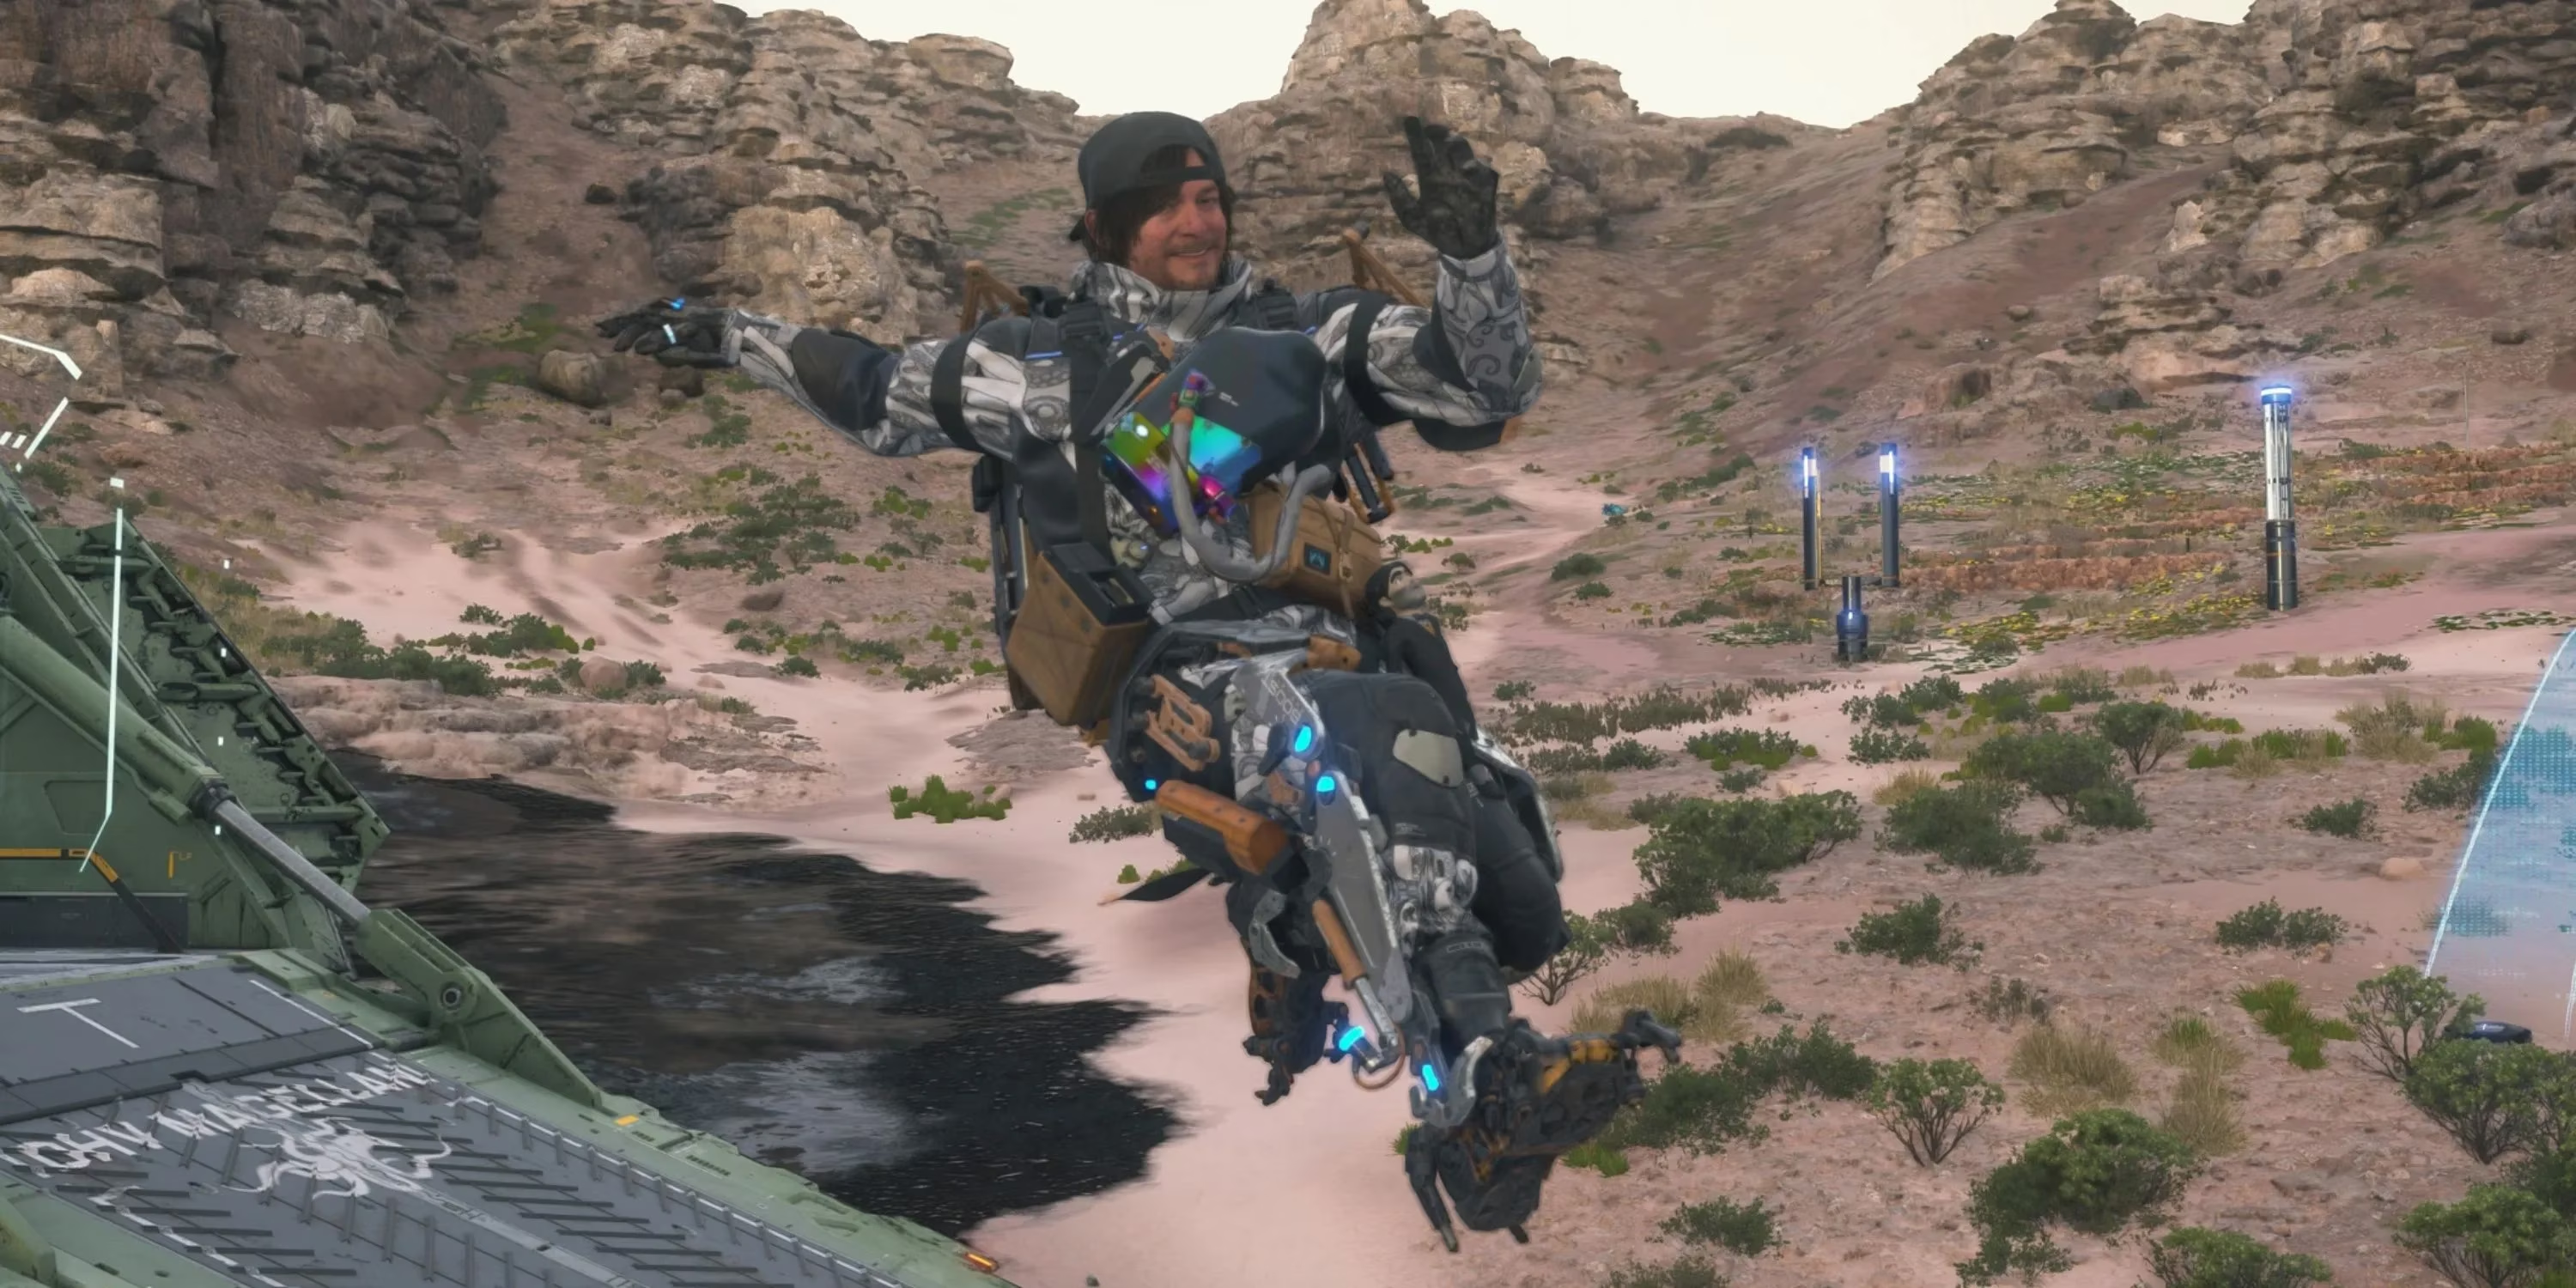 This one transforms Sam into a blur on the landscape, with enhanced mobility that lets him sprint faster, jump higher, and cover distances in record time. Facing a pack of hostile MULEs or a terrifying BT encounter? Just hit the boost and zip away—outrunning even the fastest vehicles in the game. It's exhilarating, almost like flying across the Australian outback. The extra jump height and distance add a layer of fun to exploration, turning mundane treks into adrenaline-pumping escapades. But speed has its downsides. Running at full tilt drains stamina and battery power rapidly, and the skeleton forces Sam to carry less cargo than the others. That means players need to pack light, which can be a pain for delivery missions. Yet, in tight spots where evasion is key, the Boost Skeleton is a lifesaver. Some might argue it's the best for dynamic playstyles, but others miss the heft of extra supplies. It's a rollercoaster of pros and cons. 🚀
So, how do these skeletons stack up against each other? Here's a quick comparison to help players weigh their options without spoiling the fun of discovery:
| Skeleton | Key Strengths | Ideal For | Major Drawbacks |
|---|---|---|---|
| Bokka | Unmatched terrain stability, extra cargo capacity | Heavy hauling, snowy or uneven paths | High battery and stamina drain |
| Battle | Enhanced defense, slight speed boost, good cargo | Combat scenarios, early-game survival | Poor for stealth, not the fastest |
| Boost | Top-tier speed, jump height, maneuverability | Fast escapes, avoiding combat | Low cargo capacity, quick drain |
Players often find themselves switching between these based on the mission—maybe Bokka for a mountain climb, Battle for a bandit camp raid, and Boost for a quick getaway. But which one reigns supreme? That's the beauty of Death Stranding 2: it doesn't hand you a winner. Some swear by the Boost for its freedom, while others stick with Battle for reliability. It's a personal choice, shaped by how you face Australia's dangers. After all, the best skeleton isn't about stats; it's about how it makes you feel during those heart-pounding moments. Will you choose caution, courage, or chaos? The answer lies in your journey. 🌄
The following analysis references Gamasutra (Game Developer), a respected source for developer insights and industry trends. Their coverage of exoskeleton mechanics in open-world games like Death Stranding 2 often emphasizes the importance of balancing player agency with environmental challenges, noting how equipment choices such as the Bokka, Battle, and Boost Skeletons can fundamentally alter both traversal and combat strategies for a more immersive experience.